This article describes how an eBook Admin creates a Class and a Student Enrollment Pin enabling students to access their digital license and appear on the class roster.
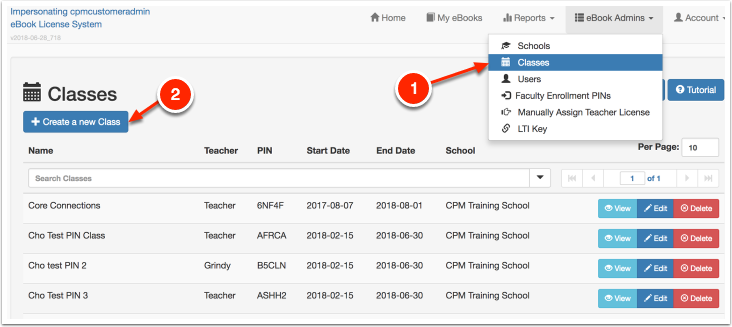
1. Under 'eBook Admins':
- Select 'Classes'.
- Click the 'Create a new Class' Button.
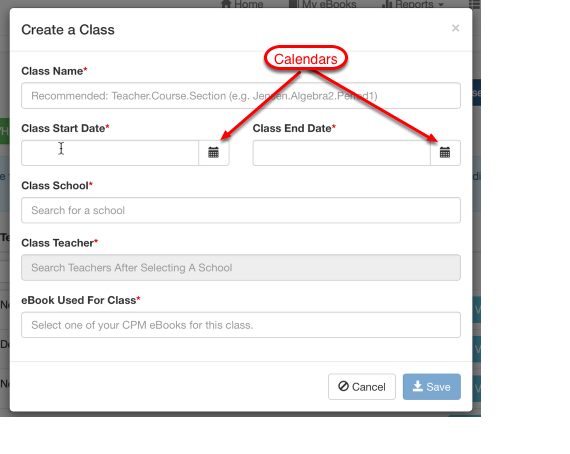
2. Click the BLUE button 'Create a new Class'. Complete the form as described in the notes below.
- Type in a description of your class that allows for an easy search.
- Click the calendar icon at the right of each date field. Click the date on the calendar to autofill.
- Click the box below the 'Class School'. A list of schools will appear below the box. Click on one of them to autofill. Note: if no schools appear, go to 'eBook Admins' --> 'Schools' and create a school.
- In the box below 'Class Teacher', a list of teachers will appear. Click on one of them to autofill.
- Click in the box below 'eBook used for class'. A list of digital licenses will appear. Click on the pertinent license to autofill.
- Save.
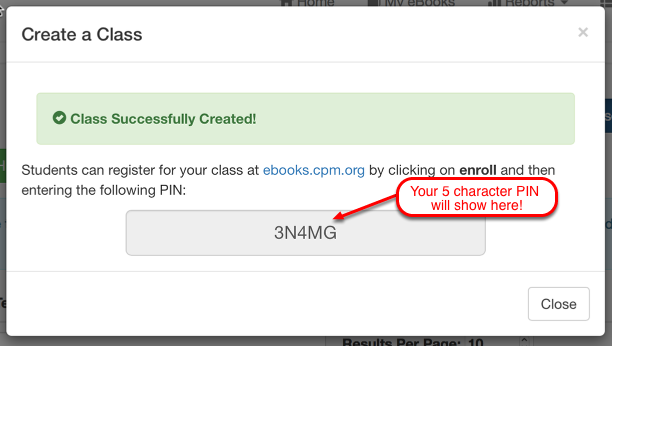
3. An Enrollment Pin is displayed to share with class students.
Students go to https://enroll.cpm.org and enter the PIN to access the class digital license.